
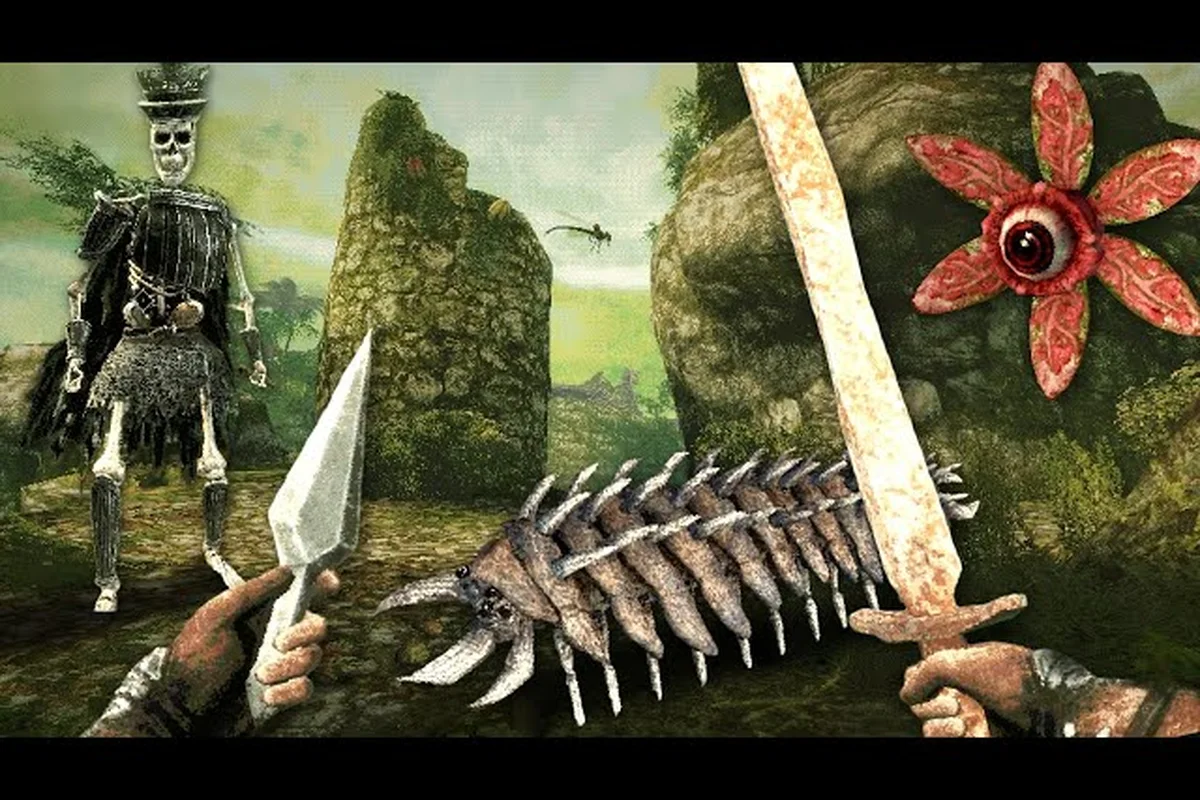
Learning how to fight in Queen's Domain matters because its stamina meter makes every retreat, charge, and weapon special a resource decision. Use this guide to build safe attack timing, verify regeneration in-game, and turn pressure into a repeatable drill. Official updates for queens domain how to fight provide authoritative guidance on combat mechanics and strategies, as detailed in the official Steam news.
Queen's Domain Attack Timing and the Stamina Window
Queen's Domain attack timing begins with choosing one clear action for each exchange rather than pressing several attacks at once. The official combat foundation is a classic stamina meter, plus charge attacks and a weapon-specific special for every melee weapon. That creates a simple rule: one committed action, then one recovery decision. The developer has not published exact stamina values, so treat the meter itself as the authority.
The practical value of that rule is that you can read the fight without guessing hidden numbers. A green or available meter may support another action, while a low meter means you should disengage, block a route, or create distance. Because exact costs are not documented as of 2026-10-31, compare the same weapon before and after upgrading it rather than assuming every upgrade is stamina-neutral.
| Combat action | What is confirmed | Timing decision |
|---|---|---|
| Basic melee attack | Melee combat uses a stamina meter | Commit only when the meter can support the action and recovery |
| Charge attack | Charge attacks are part of combat | Use only when the target is stable and the wind-up is safe |
| Weapon special | Every melee weapon has its own special | Treat it as a separate action, not an automatic follow-up |
| Throwing weapon | The game includes 20+ types of secondary throwing weapons | Use when it solves positioning without trapping your main plan |
| Sprint | Sprint is part of movement, but costs are not published | Observe the meter before assuming a sprint is free |
Reading the exchange, not guessing the numbers
A reliable exchange has three phases: commit, recover, and reassess. Commit means the chosen swing or special has begun. Recovery covers the moment when the animation leaves you unable to act safely. Reassessment is the short period in which you look for a finishing opening, a safe retreat, or a reason to remain in melee range.
That sequence matters because a successful hit does not necessarily mean a second hit is affordable. If the meter drops after the first attack, the next move should be chosen from your remaining budget rather than from a combo habit. This is the central idea behind the broader Queen's Domain combat guide, which examines the stamina meter, charge attacks, and special attacks in more detail.
A safe timing test for any weapon
Test each melee weapon in a low-risk area before relying on it in a difficult encounter. Record four visible states: the meter before the attack, the state immediately after the swing, the state after the animation, and the state after a short pause. Repeat the same swing five times because a single sample can be distorted by uneven movement or a different enemy reaction.
| Observation | Practical interpretation |
|---|---|
| Meter barely changes after the swing | The attack may fit comfortably inside your current budget |
| Meter falls but quickly becomes usable | A short pause may be enough for another basic action |
| Meter remains low after recovery | Special attacks and sprinting may no longer be available |
| Charge ends with little meter remaining | Charge attacks may need a larger safety margin than basic swings |
| Special consumes the remaining bar | Save the weapon special for a decisive or clearly safe opening |
Do not describe this as an exact frame-data chart. The developer has not documented stamina costs, regeneration rates, attack speed, invulnerability frames, parrying, blocking, or poise as of 2026-10-31. What the test gives you is a personal combat budget based on visible game feedback, which is more dependable than an invented number.
Queen's Domain Stamina Regeneration: Documented Limits
Queen's Domain stamina regeneration is documented only as a stamina meter that drives combat. The official launch trailer shows stamina-based melee combat, but the developer has not published a regeneration rate, delay after spending, or formula tied to equipment and upgrades. As of 2026-10-31, those details must be verified in game.
This uncertainty does not make stamina management guesswork. You can build a clear picture by separating three questions: whether the meter regenerates while standing still, whether movement changes that behavior, and how much of the bar returns after a commitment. The answers may vary by platform, patch, weapon, or action, so repeat the test after major changes.
Verify regeneration with a controlled stopwatch
Stand in a safe, repeatable location and let the meter refill completely. Note the approximate time required, then repeat three times without taking damage. Next, perform a basic swing and time from the end of the animation until the meter appears full again. Finally, repeat after a heavier commitment such as a charge attack.
| Test | Record | Keep in mind |
|---|---|---|
| Uninterrupted recovery | Time from full to full | This creates your baseline |
| Recovery after a basic swing | Time from swing end to full | The swing may influence the delay |
| Recovery after a charge attack | Time from attack end to full | Heavy actions may require more patience |
| Recovery after a weapon special | Time from special end to full | Test each weapon separately |
| Recovery while moving | Meter behavior during cautious movement | Sprint behavior may differ from walking |
These timings are observational measurements, not published specifications, so treat the stopwatch results as a practical baseline rather than an exact regeneration formula. Compare the basic swing with the charge attack and weapon special, and repeat the test after sprinting or jumping if those actions affect the meter’s delay. For example, if a charge attack adds several seconds before the meter refills, use that difference when planning Queens Domain combat basics. The Queen's Domain stamina tips guide complements this approach by focusing on practical stamina use, healing decisions, and common beginner mistakes across the wider game.
Stamina has more than one budget
Thinking of three-part stamina budget helps prevent mistakes: movement, commitment, and recovery reserve. Movement covers sprint and any jumping that consumes stamina, if it does. Commitment covers attacks, charges, and weapon specials. Recovery reserve is the portion you intentionally leave available for danger, because an enemy may interrupt a planned second swing.
| Budget priority | Best use | Cost of wasting it |
|---|---|---|
| Safety reserve | One escape action or reaction to an incoming hit | Forced damage while the bar is empty |
| Commitment budget | A basic attack, charge, or weapon special | A long recovery with no useful follow-up |
| Movement budget | Crossing danger or creating space | An enemy catches you during a vulnerable transition |
Do not spend the safety reserve merely to land a second hit. A retreating player with half a meter of useful movement can still fight; a player who spends everything on the second swing may have no practical way out. The amount of the reserve you want will depend on the enemy, weapon, and room, so test rather than assume.
What regeneration does not guarantee
A full meter does not prove that every action is affordable. It only indicates that the stamina resource is available. You still need to account for the cost of the next swing, the time needed to use it, and the vulnerability created by committing. Special attacks may consume more than basic swings, but their individual costs are not documented as of 2026-10-31.
Likewise, regeneration timing does not confirm that healing, eating food, or equipment changes stamina behavior. Food is confirmed to raise stats, while life points and life charms belong to the broader health system. Any claimed connection to stamina should be treated as unverified unless the current game display or developer documentation proves it.
Queen's Domain Sprint, Jump and Positioning
Queen's Domain sprint is a movement choice with a clear purpose: close distance, cross open ground, or escape a bad angle. Queen's Domain jump behavior is less clearly documented, and the safest advice is to observe whether jumping consumes stamina and whether its height or distance changes under pressure. No numerical sprint cost, jump distance, or jump stamina rule is documented as of 2026-10-31.
Positioning should therefore be based on reach and sightlines rather than an assumed dodge button. Media previews describe parrying, but the developer has not documented a parry or block system. The official launch trailer also shows the Holy Sword Endu being used for flight between platforms, but that is the traversal sword rather than proof of a universal flight or dodge mechanic. Positioning remains the dependable option.
Choose movement by purpose
There are three practical movement jobs in a fight: approach, orbit, and exit. Approach reduces the distance between you and a target. Orbit moves around the target while preserving a view of it. Exit creates enough separation to restore a workable stamina level. Treating all three as the same sprint action makes fights harder to read.
| Movement need | Preferred action | Why it works |
|---|---|---|
| Reach a distant enemy | Controlled sprint | Arrives with a clearer attack decision |
| Avoid a frontal threat | Lateral orbit | Changes the angle without committing to a long retreat |
| Recover after a heavy action | Backward exit | Gives the meter time to refill while maintaining awareness |
| Cross terrain near a hazard | Short, deliberate movement | Reduces the chance of overshooting a platform or safe area |
| Chase a retreating enemy | Burst sprint | Limits travel time without committing the whole fight to a chase |
For a deeper look at reach, health, and control decisions, the life points and combat controls reference explains how to judge an attack’s risk against your remaining life points and stamina regeneration. Use that data before sprinting: if an enemy is still beyond reliable attack range, close with a controlled sprint; if the opening is too wide, orbit or exit instead of forcing a low-value jump or strike. This prevents an ordinary approach from becoming a stamina emergency and makes each committed hit a deliberate choice.
Verify sprint and jump in three passes
Find an open area with enough room to move safely. During the first pass, sprint for a fixed distance and watch the meter before, during, and after. During the second, repeat while turning to compare movement with a stationary recovery. During the third, jump from the same mark under different conditions: still, walking, sprinting, and after a melee swing.
| Verification | Look for | Avoid assuming |
|---|---|---|
| Sprint before combat | Whether stamina falls during movement | That sprint is unlimited or free |
| Sprint after combat | Whether the meter is already lower before movement | That walking always restores it identically |
| Standing jump | Whether the jump consumes stamina | A fixed distance or height |
| Sprint jump | Whether the meter changes more than with a sprint alone | That the jump can be repeated safely |
| Jump after attacking | Whether an empty meter changes the action | That jumping always restores stamina |
The key result is practical rather than numeric. If sprinting empties the meter, use it for defined bursts rather than constant movement. If a jump has no visible cost, still avoid relying on it as an escape unless the surrounding encounter gives you a reason to test that assumption.
Position around threats, not around an animation
Facing the enemy matters, but space also matters. Use walls, pillars, pits, and other visible terrain features to limit approach angles, although the game does not document exact enemy pathfinding. Avoid standing where a missed swing carries you toward a hazard. If a fight offers multiple exits, fight near the one you can use without turning your back.
The world is one interconnected island with secrets and shortcuts, and cliffs act as major traversal gates. That layout rewards retreat planning: before committing, identify a retreat route that does not require jumping blind or sprinting across an exposed edge. If the route is uncertain, preserve stamina and create space until it becomes clear.
A Repeatable Queen's Domain Melee Drill
A repeatable melee drill turns Queen's Domain combat basics into habits instead of improvisation. Choose one melee weapon, one safe target, and a fixed sequence that lets you compare normal attacks, charge attacks, and the weapon's special without changing too many variables at once.
The drill should reveal when you can attack, when you must withdraw, and what your chosen weapon does to the meter. Keep a simple log with four columns. This is more useful than chasing exact frame numbers because the necessary information is not published and may change after updates.
| Trial | Attack sequence | Record | Success condition |
|---|---|---|---|
| A | Five basic attacks with short pauses | Meter after each swing | The final basic attack remains practical |
| B | Basic attack, pause, weapon special | Meter before and after the special | The special can be used without trapping yourself |
| C | Charge attack followed by one basic attack | Meter and recovery time | The follow-up is affordable when needed |
| D | Three attacks, then a backward exit | Distance and remaining meter | Retreat begins before the meter is exhausted |
| E | Repeat D with a sprint | Meter during escape | A safe exit remains possible under pressure |
For enemy-specific pressure, compare the same drill against one of the four creatures officially named by the developer: Mimic, Star Lizard, ojum lizard, and eye plants. Their combat behaviors are not documented as of 2026-10-31, so use the drill to observe rather than assuming a fixed pattern. A Mimic may behave differently from an ordinary target, but its exact response, weaknesses, and rewards should be verified in the current build.
Run the drill in four phases
Phase one is observation. Stand near a target and use one basic attack at a time, watching the stamina meter, enemy movement, and your own recovery before adding a special or charge. For example, test a single basic attack, note how much stamina it costs, and wait until the meter visibly refills before trying the next action; this isolates attack timing from movement and makes each result easier to compare.
Phase two is commitment. Repeat the same attack, then deliberately try one extra action. Notice whether the extra action is practical against a stationary target. That result tells you the upper edge of the basic sequence, not whether it is safe against a moving enemy.
Phase three is interruption. Begin a second attack while the target is approaching. If the target changes direction, cancel the planned follow-up and leave yourself an exit. This teaches a rule that cannot be reduced to a combo: the opponent’s response outranks the combo’s order.
Phase four is recovery. After committing, move away at a controlled pace. Record whether the meter returns while you move and whether the recovered portion is enough for a useful response. The stagger and hit-and-run guide expands on creating openings and managing pressure, but the drill keeps the focus on repeatable timing.
Interpret results with clear labels
Label each attempt instead of relying on a vague feeling. “Committed” means the action began. “Recovered” means you can safely act again. “Interrupted” means the enemy changed the situation before the sequence finished. “Reset” means you stopped the exchange and rebuilt space and stamina.
| Result | What to do next time |
|---|---|
| Attack connects, meter remains useful | Test whether the next action also connects |
| Attack connects, meter becomes low | Retreat before attempting another commitment |
| Attack misses, meter becomes low | Reduce commitment and wait for a clearer opening |
| Enemy interrupts the wind-up | Cancel, turn, and use the exit route |
| Stamina stays low during ordinary movement | Reduce sprint frequency and test recovery timing |
Do not add artificial waiting times until the drill feels easy against one enemy. That can conceal a real timing problem. Instead, record the observable condition that made the attack safe, then reproduce that condition against a more active target.
When to Disengage and Reset in Queen's Domain
Disengaging in Queen's Domain is a tactical decision, not evidence that a weapon is weak. Reset when the meter is too low for a safe response, the exit route is unclear, the enemy is attacking faster than you can respond, or the room gives it more space than you have.
The official game has more than 100 enemies, mini bosses, and bosses combined, according to the developer. That breadth makes one universal attack pattern unlikely to be sufficient. The game also contains an interconnected island and at least a 40-hour experience, so encounters can demand different approaches as equipment and enemies change. Exact enemy ranges and aggression patterns are not documented as of 2026-10-31.
A practical reset checklist
Before engaging, identify four things: the enemy’s current behavior, your meter state, the direction of the nearest safe exit, and the action you will use if the first attack fails. If any answer is unclear, reduce the commitment or gather more information. This works against named enemies as well as unidentified encounters because it depends on visible conditions rather than an invented bestiary strategy.
| Reset signal | Reason | Immediate action |
|---|---|---|
| Meter too low for the intended response | The next commitment could leave you exposed | Move away and reassess |
| Enemy closes distance during the wind-up | The planned hit may miss or be interrupted | Cancel or complete only the safest portion |
| Retreat route is behind a hazard | Escape could cause a fall or trap | Circle before disengaging |
| The room gives the enemy extra space | More space may increase its options | Seek a narrower angle if available |
| The special attack has no clear opening | Specials are separate commitments | Save it for a decisive moment |
Resetting does not mean fleeing every mistake. If the enemy is nearly defeated, withdrawing can give it time to recover or change behavior. Compare its current action with your own meter: if you can complete one safe basic attack before it acts, that may be the better choice. If it is winding up and your meter is low, distance is the only reliable answer supported by the available information.
Retreat before, during, and after commitment
Before commitment, retreat when the route is blocked or the meter is already low. During commitment, retreat when the enemy closes the angle or the intended hit is no longer clean. After commitment, retreat when the meter confirms that another attack is unsafe.
This three-stage model makes the decision consistent. It also helps avoid treating a charge attack or weapon special as automatically better than a basic swing. The official materials confirm that these actions exist, but they do not establish their exact cost-to-value ratio against each enemy. Compare them with your drill log rather than applying a universal rule.
The beginner's guide to Queen's Domain can help with the wider game systems around preparation, equipment, and exploration. For combat specifically, remember that the player must still verify unfamiliar weapons in the current build; the official launch trailer shows throwing weapons and special attacks, but it does not publish a damage table.
Finish strong by choosing a deliberate next action
A successful reset ends with intent, not wandering. Choose one of three outcomes: return with a full meter and a clearer angle, use a different action such as a thrown weapon, or leave the encounter entirely if resources and positioning are unfavorable. Each option has a different stamina implication, so record which one actually restores your ability to fight.
The final lesson is simple: read the meter, commit to one action, and leave room for the next decision. That habit covers basic swings, charge attacks, weapon specials, sprint, and uncertain jump behavior without pretending that undocumented numbers are known. Verify each detail in the current version, because Queen's Domain combat balance may change across updates.
Frequently Asked Questions
Does stamina regenerate faster while standing still in Queen's Domain?
The developer has not published a stamina regeneration formula or confirmed a standing-still bonus as of 2026-10-31. Test it directly by letting the meter fill while idle, then repeating while walking or sprinting. Compare the same duration and starting state each time, and treat any visible difference as an observation rather than an official rate.
What is the best way to run from enemies in Queen's Domain?
Move away while keeping the enemy in view, using short controlled sprints rather than one continuous burst. Preserve enough meter for at least one response, and turn around corners or toward obstacles before committing to distance. Exact sprint stamina costs are not documented as of 2026-10-31, so verify how quickly the meter changes during your preferred escape pattern.
Can jumping be used as a dodge in Queen's Domain?
Jump behavior and any stamina cost are not documented as of 2026-10-31, so it should not be assumed to provide invulnerability or replace a dodge. Use it to cross terrain or gain reach when needed, but avoid relying on it as your primary escape unless testing clearly shows that it creates safe distance in the current encounter.
Should every melee weapon be used until its special is unlocked?
No. A weapon is more useful when its timing and stamina demands fit the encounter. Test the basic attack, charge attack, and weapon-specific special separately before combining them, then compare how each affects your remaining options. Remember that a special may consume much of the meter, leaving little room for movement or recovery.
How often should I retreat during a fight in Queen's Domain?
Retreat whenever the meter cannot support a safe response, the enemy controls the space, or your exit route is unclear. There is no documented fixed retreat interval because enemy behavior and stamina costs are not published. Use your drill log to identify the point where your next action becomes impractical, then make that point your consistent reset signal.