
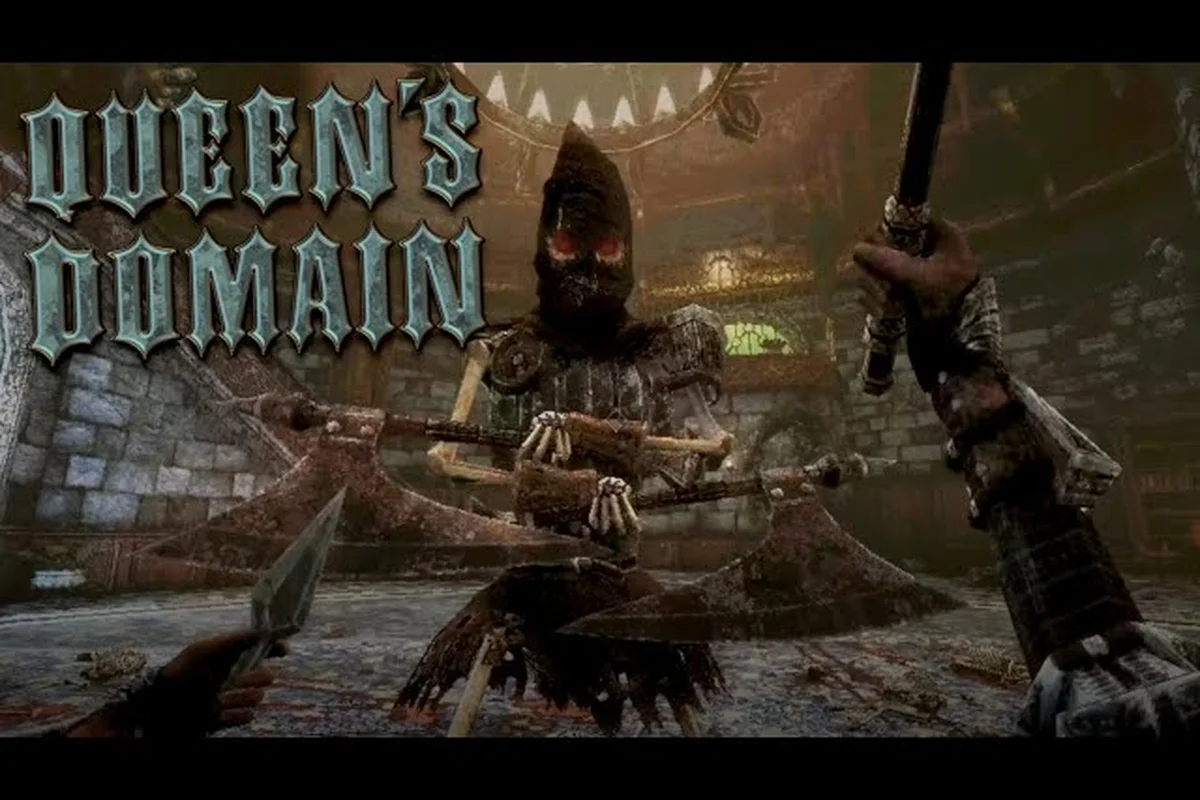
Queen’s Domain crowd control matters because crowded rooms turn one costly swing into several simultaneous threats. This guide explains how spacing, throwing weapons, stamina, and target priority help against multiple enemies, Eye Plants, Mimics, and Star Lizards. Rather than trading hits in the middle of a swarm, keep enemies on separate sides of your aim line, use thrown weapons to interrupt or pull pressure from the nearest target, and reserve stamina for repositioning when a Mimic closes the gap or a Star Lizard forces you to create distance. Prioritize the enemy that can break your spacing first: an Eye Plant that blocks your line of sight, a Mimic that reaches melee range, or a Star Lizard that pressures your escape route.
Why Groups Punish Charge Attacks in Queen's Domain
Queen's Domain builds its fights around a classic stamina meter, and that one bar is spent by charging an attack, by firing a weapon's own special, and by throwing a secondary weapon. That makes a group fight less about finding one perfect combo and more about deciding which enemy deserves your remaining resources. If you commit to a long charged swing while several creatures are active, a missed hit can leave you surrounded with no immediate room for the next action.
The safest way to handle Queen's Domain multiple enemies is therefore to preserve the option to reposition. Do not treat every opening as a signal to stand still. A short attack can create space, a throw can hold one target outside melee range, and a retreat can restore a safer distance before another exchange. This is a practical interpretation of the documented stamina-driven combat loop, not a claim about an undisclosed dodge system.
The Stamina Decision Before Contact
A charge attack is attractive because it appears capable of producing a strong opening, but the developer has not documented exact stamina costs, charge duration, damage multipliers, or cancellation rules. Because those values are not documented as of 2026-10-31, you should verify them through observation rather than rely on a fixed number. Pay attention to what happens to the stamina bar when you begin and release a charge, and whether the animation can be interrupted.
When two or more enemies are visible, prioritize containment over damage: use a thrown weapon to delay a distant Mimic or Star Lizard while keeping melee threats outside your immediate recovery space. Because the exact stamina cost and charge duration remain undocumented, treat each charge as a lane-management tool rather than a guaranteed opener, and verify its drain, interruption behavior, and recovery window through careful observation before relying on it in a crowded encounter.
-
Choose an opener: use a thrown weapon if one target can be contained at range.
-
Control the lane: avoid standing where a melee attacker and a ranged attacker can both reach you.
-
Watch the meter: start the charge only when the current lane is stable.
-
Release with purpose: swing at the target that could otherwise reach you during the recovery.
-
Leave before the second wave: reposition instead of beginning another full commitment.
| Group situation | Better first action | Reason | Verification needed in game |
|---|---|---|---|
| One close enemy, one distant enemy | Throw at the distant target | Prevents the distant threat from entering melee range while you handle the closer creature | Check throw travel, impact, and recovery |
| Two close enemies, one attacking lane open | Short attack toward the open lane | A quick commitment may preserve mobility without relying on an exact dodge timing | Compare the short attack with a charge |
| Three or more enemies around the player | Create distance before committing | More threats mean less room for a missed attack and recovery | Observe whether retreating interrupts enemy tracking |
| A stationary-looking object behaves like an enemy | Prepare a ranged opener | Mimics can punish a direct approach if their behavior is not confirmed | Identify the Mimic before entering melee range |
| A small moving creature crosses the lane | Hold the throw | A misplaced throw may waste both range control and stamina | Test how Star Lizards react to thrown attacks |
Opener continuity means every action should leave the next one possible. A throw that lands on a Mimic or Star Lizard but leaves you surrounded by melee attackers may be less valuable than one that buys enough time to reposition safely. For example, in the three-or-more-enemies case, a ranged hit that delays the distant target while preserving an open escape lane creates better follow-up options than maximizing immediate damage; compare the throw’s impact and recovery with the short attack before committing to a charge.
Why Recovery Matters More Than Maximum Damage
The official combat information confirms charge attacks and weapon-specific special attacks, while the launch trailer also shows stamina-based melee combat and throwable weapons. However, no official timing chart establishes which option is always most efficient. The useful comparison is therefore situational: what does each action cost in attention, and what danger does it leave unresolved?
| Action | Best group role | Main advantage | Main risk |
|---|---|---|---|
| Light or short melee swing | Close-range pressure | Keeps the player near a chosen lane | May not stop an enemy behind the player |
| Charge attack | Punishing a confirmed opening | Potentially stronger than a short attack, though this is not numerically documented | Long commitment and possible recovery exposure |
| Weapon-specific special | Finishing or interrupting a selected target | Provides a tool distinct from the basic swing | Exact cost and control are not documented |
| Thrown weapon | Ranged control | Creates distance from one threat without closing with it | May miss or leave the thrower's lane exposed |
Stamina preservation is more valuable during a crowd than during a duel, because each additional enemy can interrupt the next planned attack. The best opener is not necessarily the one with the biggest theoretical damage; it is the one that removes one threat while maintaining space for the rest.
Spacing and Throwing Weapon Openers
Throwing weapons are a documented part of combat, with more than 20 secondary types available, but the developer has not published a list of exact throwing costs, ranges, or enemy resistances. This guide therefore focuses on a repeatable spacing test instead of assigning unsupported values. You can verify each result yourself by using the same throw against the same creature in a controlled area.
A good Queen's Domain crowd control opener establishes which enemies are dangerous immediately, which can be delayed, and which are harmless to ignore for a few seconds. For multiple enemies, the throw should often target the threat that reduces your available movement most. A stationary ranged attacker matters more than a slow melee creature if the latter can be sidestepped while the former can shoot into the path you need.
Create a Three-Zone Threat Map
As you enter a room, classify visible creatures into three temporary zones: immediate, approaching, and delayed. Immediate threats are already within striking distance. Approaching threats are moving toward you but can still be redirected. Delayed threats include eye plants, distant enemies, or creatures crossing from another lane.
| Threat zone | Test | Preferred response | Result to seek |
|---|---|---|---|
| Immediate | Can it reach you before your next attack? | Short attack, reposition, or retreat | A clear exit lane |
| Approaching | Will it enter range during recovery? | Throw or move to change its approach angle | More time for the current target |
| Delayed | Can it be ignored briefly without blocking a route? | Keep monitoring while handling a closer threat | A one-enemy-at-a-time fight |
Threat zoning is temporary, not a permanent enemy classification. If a Star Lizard changes direction or an eye plant begins firing sooner than expected, reassign its zone immediately rather than relying on your first label. For example, a Star Lizard moving from the approaching zone into melee range becomes an immediate threat and may need to be redirected with a throw, while an eye plant that opens its firing lane should be treated as immediate even if it was previously marked delayed. Rechecking zones each time you recover from an attack preserves the table’s goal: clear an exit lane, protect the current target, and avoid blocking your route with multiple enemies.
The Controlled Throw Test
Find a safe patch of ground, throw a secondary weapon at a nearby target, and note five things: whether it leaves your hand, how long the action takes, how far the weapon travels, whether the target reacts, and what you can do during the sequence. Then repeat against a different enemy type. The official Queen's Domain Steam news documents later fixes involving a Mimic freeze and a floating Star Lizard bag, confirming that these creatures are part of the shipped game while leaving their exact behaviors unstated.
Use the Controlled Throw Test results to build a simple personal rule for each enemy type: treat a quick, reliable Star Lizard throw as crowd-control pressure, but treat a slow throw or frequent miss as a warning to reposition rather than force a ranged attack. This matters because Mimics can close the gap quickly, while Eye Plants may occupy space differently; recording each target’s reaction and recovery window gives you a practical basis for choosing between spacing a lane and committing to a priority target.
-
If the throw creates distance without a noticeable opening, use it as a lane-control tool.
-
If the throw produces a long opening, use it as a priority-squander tool before committing to melee.
-
If the throw misses often, shorten the distance or use it only against stationary targets.
-
If an enemy closes during the throw, treat the action as an opening attempt rather than a free action.
When to Stop Throwing
Continued throwing can become a trap when it prevents you from using the weapon you need for the nearest threat. The key question is whether each throw removes a threat from the current encounter. If the same enemy walks forward while you throw, the throw has not controlled it. Switch to a short melee action, retreat, or use a different angle rather than repeating the same input.
A broader reference to the Queen's Domain enemy behavior overview can help separate known creature names from undocumented behavior. Do not infer that a creature is safe because it is visually small or stationary. The bestiary records encounters, but official sources do not publish enemy scripts, aggro ranges, or interrupt conditions.
Eye Plants and Ranged Pressure
Eye plants are one of only four named creature types officially documented for Queen's Domain, alongside the Mimic, Star Lizard, and ojum lizard. Their name implies a ranged role, but the developer has not published their attack pattern, projectile speed, firing interval, range, health, or behavior when the player closes distance. For Queen's Domain ranged combat, the reliable strategy is to observe rather than assume.
Treat an eye plant as a directional constraint whenever it is active. It narrows the spaces where you can safely stand, especially if the plant occupies a corner, platform edge, or line beside an enemy approach. Rather than asking whether one eye plant can defeat you, identify how its firing line changes your route through the room.
Break the Ranged Line
Ranged pressure becomes easier to manage when the player stops moving directly along the plant's line. Use pillars, elevation changes, platform edges, and changes of direction to shorten or interrupt the firing opportunity. The official game information does not document whether plants can rotate, track, or break line of sight, so treat these as things to verify by moving around cover and watching what happens.
| Observation | Likely tactical conclusion | Practical test |
|---|---|---|
| The plant fires only in a straight line | Use perpendicular movement or nearby cover | Step sideways rather than directly forward |
| The plant follows the player | Move to break the angle | Change direction twice while keeping distance |
| The plant has a visible wind-up | Time movement around that cue | Count the wind-up only after observing it |
| The plant does not react to movement | Cross its lane during melee recovery | Mark its fixed lane and plan the route |
| Damage arrives after a delay | Keep moving until the projectile lands | Avoid standing at the impact point |
Line-of-sight testing is more reliable than a fixed safe distance. Place one object between the player and the plant, then move while watching whether the plant continues its attack. Repeat without cover. Since no official eye-plant statistics are available, both tests should be used to establish the behavior in the current version.
Coordinate Ranged and Close Threats
An eye plant is most dangerous when it covers the route required to handle a melee enemy. In that situation, the plant becomes the first target because moving toward the melee creature may force you through the projectile path. If the plant is harmless while another enemy is active, focus on the melee threat and adjust your route around the plant instead.
A useful priority order is to separate threats by how directly they restrict movement and how quickly their behavior can change the encounter. For example, if a ranged Star Lizard holds a firing lane while an eye plant blocks the only safe approach to a melee enemy, the projectile lane should be evaluated first because engaging the plant may expose you to sustained ranged damage. If the eye plant is inactive and the melee creature is closing distance, however, the immediate attacker becomes the relevant target.
-
Crossing threat: anything that closes the lane needed for your next action.
-
Sustained pressure: a ranged attacker that can fire while you approach another target.
-
Immediate attacker: a melee creature already threatening your position.
-
Delayed threat: an enemy whose behavior has not yet interrupted your route.
This is a decision framework rather than a claim that eye plants always have priority. If a plant remains passive and a fast creature reaches you, the immediate attacker naturally takes precedence. The Queen's Domain crowd control strategy offers a useful distinction between weapon behavior and enemy-specific testing, although exact weaknesses are not documented as of 2026-10-31.
Confirm the Eye Plant in the Bestiary
After an encounter, open the bestiary and check the eye-plant entry. The game confirms that this encyclopedia can be scrolled with a controller, but most entry details and unlock conditions are not publicly documented. Record only what you personally observed, such as tracking behavior, firing direction, apparent range, and interruption after damage. Avoid turning a single sample into a universal rule, because enemy variation and room layout may change the result.
Mimics and Star Lizards in Tight Spaces
Mimics and Star Lizards both create specific hazards in cramped spaces, but the official baseline does not publish their attack scripts, health, speed, size, damage, or aggro rules. That makes careful observation essential. The Queen's Domain mimic enemy may punish an unsafe direct approach, while the Queens Domain star lizard may compete for space around a target and complicate a clean swing.
Treat Mimics as Unconfirmed Threats Until Tested
A Mimic should not be approached simply because its container resembles an object. At the same time, the game does not officially define every Mimic as hostile or specify how it signals activation. Before committing, look for changes in position, animation, sound, or response to nearby movement. These are verification cues, not confirmed universal tells.
| Test | What it reveals | Safer action |
|---|---|---|
| Throw from outside the suspected object | Whether a ranged attack produces a reaction | Keep a retreat route |
| Observe from one side only | Whether the object tracks movement | Change sides before approaching |
| Attack once and move away | Whether damage changes its behavior | Do not remain beside it |
| Compare with ordinary containers | Whether animation or audio differs | Mark the likely Mimic and choose another route |
Mimic verification is safer than guesswork. If the object responds to an attack or movement, treat it as active and regain distance. If no response occurs, do not claim it is harmless; the enemy may simply have a delayed trigger or different behavior in a different room.
Version 1.01.01 fixed a Mimic freeze, as noted in the official Steam news feed. This establishes that freezing occurred in earlier versions but does not define the intended Mimic behavior. Players should verify the encounter in the current patch rather than assume the old freeze is still present.
Account for Star Lizard Movement
The Star Lizard is another documented named creature, and version 1.01.01 addressed a floating bag associated with it. Its actual combat pattern is not documented. Watch whether it moves directly toward the player, circles a target, crosses attack lanes, or ignores nearby targets. That movement determines whether it should be a first target, a delayed threat, or a distraction you can use to redirect attention.
Small or fast creatures are often described as harmless in generic action-game advice, but that assumption is not appropriate here. The Queens Domain star lizard has no published defense or damage thresholds, so a small hit does not prove that it is unimportant. Test whether it continues moving after a hit and whether attacking it creates an opening elsewhere.
If a Star Lizard repeatedly enters your attack lane, move before swinging rather than trying to hit it and the main target together. A missed wide swing costs attention and may expose the recovery. If it remains outside your route, let it remain a delayed threat while you clear the immediate attacker.
One Target at a Time in Corridors
Tight rooms reduce your options because a frontal engagement can trap you between a wall and a moving creature. Choose a target, establish enough distance for one clear attack, and do not chase a second target during the same recovery. This reduces the chance that a Mimic or Star Lizard activates while your weapon is committed elsewhere.
A concise record of every confirmed creature behavior belongs in a personal bestiary rather than an invented rulebook. The Queen's Domain enemy overview lists the confirmed names, while the official Steam Community page confirms the broader achievement structure without publishing creature stats.
Resetting a Bad Pull in Queen's Domain
A bad pull is not simply a fight you lost; it is a sequence that allowed enemies to surround you or stacked threats during recovery. Resetting means restoring control of the lane, reducing simultaneous pressure, and choosing a safer first exchange. The documented mechanics support this approach because stamina governs melee combat and throwing weapons provide an additional action type.
The objective of Queen's Domain crowd control after a mistake is not to keep attacking. Break the engagement, identify the most dangerous remaining threat, and re-enter on your terms. This works better than demanding a flawless dodge because no dodge timing, i-frames, poise, or parry system is officially documented.
The Five-Step Escape Reset
-
Stop the commitment: release or cancel the current action when possible, but verify in game whether either response is available.
-
Move out of the shared lane: step toward open ground rather than directly away from every enemy.
-
Create one ranged pause: throw at the threat that can reach you fastest or block your best route.
-
Choose the next target: remove immediate pressure before dealing with distant or optional enemies.
-
Resume in short exchanges: attack, observe, and reposition instead of beginning another blind charge.
| Symptom of a bad pull | Likely cause to check | Reset priority |
|---|---|---|
| Two attacks land from opposite sides | Enemies occupy separate approach lanes | Change angle or break one lane with a throw |
| A charge leaves you surrounded | The target moved while you committed | Retreat after the recovery and re-open with distance |
| Eye plant shots block a melee route | Ranged pressure overlaps the melee lane | Prioritize the eye plant or use cover |
| Mimic activates beside a target | Two threats were allowed to overlap | Separate the Mimic from the other enemy |
| Star Lizard repeatedly interrupts a swing | The moving creature crosses the strike path | Let it pass or redirect the fight |
Lane ownership is the simplest reset rule: only one enemy should control your immediate path at a time. If another creature can reach you from the side while you deal with the current target, the encounter is not stable enough for a charge.
Reset With the Right Economy
If the stamina bar is low, throwing a weapon may be better than another melee commitment, but only if the throw itself does not leave you stationary in a dangerous lane. If the bar is comfortable and the enemy is already close, a short attack may produce a quicker reset than throwing. Use the test method established earlier and observe the outcome.
Do not chase a theoretical optimum that the game does not publish. There are no documented stamina regeneration rates, exact throw costs, or frame data, so every reset must be based on what you can see in the current encounter. A successful reset restores positional authority: one visible target, one usable route, and enough resources to choose the next action.
Logging Each Multi-Enemy Pull
After difficult groups, note the enemy mix, room shape, opening action, target order, and where the pull went wrong. Repeat the room with one variable changed. This produces better results than copying a generic rotation because the game's enemy behavior is undocumented and may not remain identical across encounters.
| Record field | Useful comparison |
|---|---|
| Room shape | Whether narrow lanes caused overlapping threats |
| Enemy mix | Whether eye plants, Mimics, or Star Lizards changed the priority |
| Opening action | Whether a throw or short attack created safer space |
| Failure point | Whether the pull failed during charge, recovery, or targeting |
| Revised order | Which enemy you handled first next time |
Failure mapping turns a chaotic fight into a controlled experiment, linking each recurring problem to a specific Queens Domain response. If an eye plant repeatedly blocks your aim or a Mimic draws the pull away from a Star Lizard, prepare a defined priority before entering the room: reposition for a clear ranged shot, mark the Mimic first, or shorten the engagement. This prevents improvised targeting, avoids overlapping threats in narrow lanes, and makes the revised order easier to verify against your log.
A Practical Routine for Every Crowded Room
A reliable crowded-room routine has four stages: scan, separate, commit, and recover. Scan identifies immediate, approaching, and delayed threats. Separate uses movement or a throw to control one lane. Commit uses the smallest action that addresses the selected target. Recover moves the fight back to a manageable state before the next target joins.
| Stage | Player decision | Action | Success signal |
|---|---|---|---|
| Scan | Which threats can overlap? | Identify eye plants, Mimics, Star Lizards, and other visible enemies | One threat is separated from the group |
| Separate | Which enemy reduces my space? | Throw, change angle, or use cover | A safe route exists |
| Commit | Which target needs immediate attention? | Use a short attack, charge, or special | The target is removed or delayed |
| Recover | Where is the next threat? | Reposition before the next commitment | Only one enemy occupies the active lane |
Target priority is contextual. A ranged eye plant may lead when it blocks movement, but a close attacker may lead if it is about to reach you. A Mimic should gain attention only after its behavior is verified, and a Star Lizard should be judged by what it does in the lane rather than its size.
This routine directly supports the combat systems documented for Queen's Domain: a stamina meter, charge attacks, weapon-specific specials, and more than 20 secondary throwing weapons. Because exact costs and cooldowns remain unpublished as of 2026-10-31, verify timing through controlled tests and preserve enough flexibility to adjust when a group behaves differently.
Frequently Asked Questions
What is the best way to control multiple enemies in Queen's Domain?
Use throwing weapons to separate one threat, preserve space for short attacks, and avoid charging while two attack lanes overlap. Rotate only after recovering from the current action. Exact stamina costs and enemy reactions are not documented as of 2026-10-31, so test each room rather than following a fixed rotation.
How should I handle eye plants during ranged combat?
Treat eye plants as lane obstacles first and enemies second. Move sideways or use nearby cover, then observe whether they track, rotate, or stop firing when blocked. Their exact range, attack timing, and behavior are not officially documented, so establish those values through repeated tests in the current version.
Is a Mimic enemy best attacked with a thrown weapon?
A throw can test a suspected Mimic while preserving distance, but it is not a guaranteed counter. Watch for movement, animation, sound, or a response to damage, and leave a retreat route. Official sources do not publish Mimic trigger rules, health, damage, or resistances.
How do Star Lizards affect crowded encounters?
Watch how a Star Lizard crosses the room before assuming it is harmless. If it repeatedly enters your swing path, let it pass or redirect the fight rather than committing to a missed wide attack. Its speed, damage, and behavior are not documented as of 2026-10-31, so use observed movement to set its priority.
Should I use charge attacks when several enemies are nearby?
Only use a charge when the target and its approach lane are stable and your stamina can support the commitment. Against several enemies, a short attack or throw may create safer space because it leaves more room to react. No official timing chart proves one option best, so compare the recovery cost in practice.